Scripting – Part 1
This post will be about scripting in Blender. When coding it’s easier to start on an example, thus I will try to introduce a simple application instead of making a boring introduction of all aspects of scripting in Blender.
Note: unfortunately I should assume a bit of knowledge of Python here. There are a lot of nice tutorials online!
Blender Settings
Before looking at the example, let’s check the Blender settings. I highly advise you to enable User Tooltips and Python Tooltips. The first will show some useful informations when you put the mouse over any property (slider, bool button, etc..) of Blender. The latter similarly also shows the data path of any property. Especially the second is really useful, as we will see soon in the example.

Text Editor
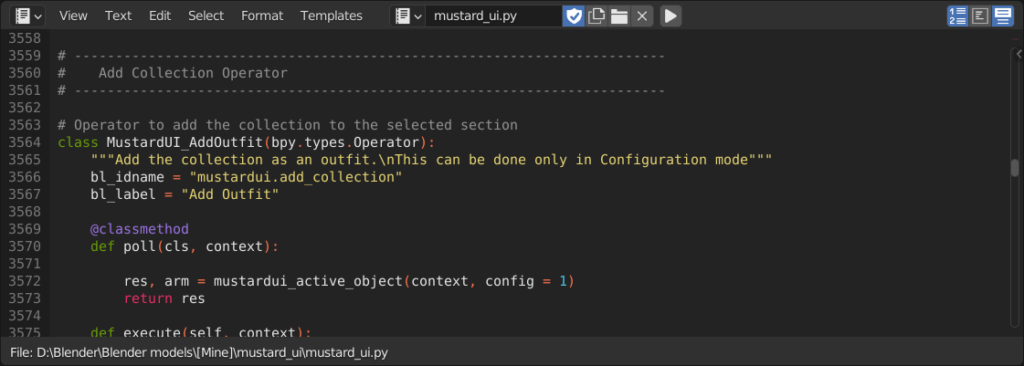
There are many ways of injecting scripts into Blender. If the scripts are small, it is easy to use the default Blender Text Editor. We can open it like we do for any other window in Blender and we can create a new text.

For clarity, I always rename all my scripts as something.py, although the .py is not compulsory.
Finally, the Play button will run any script.

First example

Have you ever wanted to disable (mute) all your shape keys with a simple script? This can be very useful when we have mesh with tons of shape keys.
Note: muting all shape keys but one is also a nice way to duplicate a shape key without dedicated addons. But this is another story. 🙂
The first thing to find in order to create a script is the data path (the address in the data structure) of the property we want to modify. For instance, in our case we want to mute all shape keys, and therefore we can start looking at the mute property.
If I put the mouse on the mute button (without clicking!) a tooltip will appear as in the figure. The long path in the figure (enclosed by the red rectangle) is exactly the data path, our starting point!
Believe it or not, this is actually all we need to know from Blender. We can now turn our attention in writing the script in the Text Editor (see part above).
Muting a single shape key
The first thing to write in any addon is:
This will tell Python to accept all Blender related commands, as it loads the correct library.
After this we can just try to copy the data path in the figure above and assign a boolean value. Always check:
- the data type: since it’s a button with a check, it’s very likely to be a True/False valued property (equivalently a 0/1 Int property).
- the value status: in this case the property is called mute (the latest part of the data path, after the latest .), and therefore we expect it to be True if we want to mute the shape key (in other words, the true/false is the contrary of the on/off button where we are taking the data path from).
Therefore we can try with:
Tip: if you right click on the mute property, you can also use the Copy Full Data Path to quickly copy the line we wrote above. No need to always copy everything, with the risk of making mistakes!
Note: change the “Key” and the “Key 8” with the values you see in your shape key data path!
Running the code (the play button, see the Text Editor section above), you will be able to mute your shape key with the script!
There are some caveats about what we just did:
- this script works only for one shape key.
- the script depends on the object we are copying the data path from through the “Key” part.
Even more dangerously, this dependence is not unique, because if we append our object in another scene where another object already have a shape key, it is very likely the script won’t work anymore. In fact, the shape_key is a data block that does not specifically belong to any object, and if during appending another object is using the name “Key” for its shape key data block, the appended one will be automatically renamed by Blender to avoid name clashing. Running that code we will either mute the “Key 8” of the non-appended mesh or end up with an error if this object doesn’t have any shape key named “Key 8”.
In the next section we will address the first problem.
Muting all shape keys
If we want to mute all shape keys, we can start again from the data paths. If we check the mute property of other shape keys with the mouse, we will see that the pattern is the following, where shape_key_name is the name of any shape key.
Looping all shape keys is therefore easy using Python. We can fix the first part of the data path (the one with the statement of which data block we are considering, bpy.data.shape_keys["Key"].key_blocks), and loop over all shape keys in the following way.
This loop will go through all shape keys and mute them. Try running it (remember to change “Key” with your data block name!).
We can improve the script a bit with the following changes.
Firstly, the Basis shape key is also muted, usually we don’t want this. To address this, we can simply add an if statement before muting the shape key, using name property of the shape_key object that is looped.
Note: the name property (as for shape_key.name) is available almost every time.
Note: another way would be to not disable only the first shape key in the data block, if you have some models where the first shape key is not called “Basis”. This is up to you!
Secondly, at the moment we are muting all shape keys. What if we want to revert? One way would be to write False insted of True on line 5, but a clever way might be to use the available informations as:
In fact, since shape_key is a boolean value, with the Python keyword we can invert its value and assign it as the new value of shape_key.mute.
Write efficiently!
After you check that the script is working, remember to try to write your codes in the most compact way as possible. Not only this will make your code more readable, but in some cases it can also improve its running time!
In our case, we can condense line 3 and 4 exploting Python standard syntax:
That is, with 3 code lines you can avoid wasting time turning on/off all shape keys every time!
Bonus: Object independent script
The second main issue of our script is that it works only with the “Key” shape_keys data block. We can solve this problem using as input of our loop the active object (the last selected object). The script would be something like:
That is, we can substitute the specific shape_key data block acquiring the active object from the context. Most of the objects, depending on their type (“MESH” in our case) have the .data specification, from which we can select the data block associated with the object (a mesh data block in our case). In other words, bpy.context.active_object.data.shape_keys is equivalent to bpy.data.shape_keys["Key"] but it now depends on the selected object, i.e., it’s not bound to the specific object from which we take the data path anymore. In fact, this script should work on any mesh object (and in fact this time I’m not telling you to modify any “Key” or similars), you can try it!
Note: confused by the data block structure? All the things we see in viewport are called Objects (from which the name Object mode), but these are just instances of the real data blocks, for instance the mesh data block, that stores all informations about the vertices, shape keys, etc. In other words, we can create different Objects with the same mesh data block.
Bonus 2: Deal with Object type error
If we try to run the script on an object that is not a “MESH” type, we get the following error in the console (on Windows, to open the console, press F3 and search for Toggle System Console; on Mac/Linux you’ll need to run Blender from the terminal).

For instance, try this creating a light and trying to run the script with the light selected. This happens because the data of the ligths obviously does not contain shape keys data blocks. This can be solved checking the data type before running the loop. For instance, we can introduce this check with an if, as:
In line 3, we check that the type is actually “MESH” before running the script. Running this on objects with other type will simply do nothing.
But we still haven’t checked all possible issues. What if we use the script on a mesh that doesn’t have any shape key?
Spoiler alert: it throws an error! We have to check that the data block shape_keys is available. To do this, we can simply add another if:
In line 4, we are now checking the existance of the shape_keys data block. Equivalently, this is the same as writing line 4 as:
Finally, the file with the script is available to play with.
Tips and tricks
All the things above might seem a bit complex, and the situation is even worse considering that the documentation is not always great. Thus, let me give you some advices when writing a new script:
- if you are not sure how to start writing a script, start from the data paths as we did here;
- use the Copy Full Data Path instead of copything the data paths manually, you will avoid any spelling mistake;
- enable the console while coding (on Windows, to open the console, press F3 and search for Toggle System Console; on Mac/Linux you’ll need to run Blender from the terminal): if there are generic errors, more informations will be available there;
- use Stackoverflow! Google your question cleverly, and you’ll surely end up on that website.
- finally, use the Python console (which is not the System console). As the Text Editor, it can be open as any Blender window. Start writing and press tab, it will help you find what you’re looking for!

Happy scripting! 🙂
Only read half way through so far but I’ll definitely be following this soon, great tutorial I didn’t think I needed – thanks.